1. Export Markers from Avid Pro Tools
Open the Markers panel in Pro Tools and export the markers as the .txt file. Alternatively, you can choose "File > Export > Session Info As Text" from the Pro Tools menu and select the Include Markers option to create the text file containing the markers with their location, name, and comments.
2. Use the "Convertor de marcaje" to convert the TXT Markers marker file into a Final Cut 7 XML marker file
Open the free Convertor de marcaje, select "Avid Pro Tools > TXT Marker (.txt)" and set "convert" to "Adobe Premiere Pro > Sequence (.xml)". Generate and download the file. Dacă aveți probleme la conversia fișierului, puteți contacta asistența gratuită.
3. Import the Final Cut 7 XML marker file into Adobe Premiere Pro
To import timeline markers, go to "File -> Import" and select the XML file.
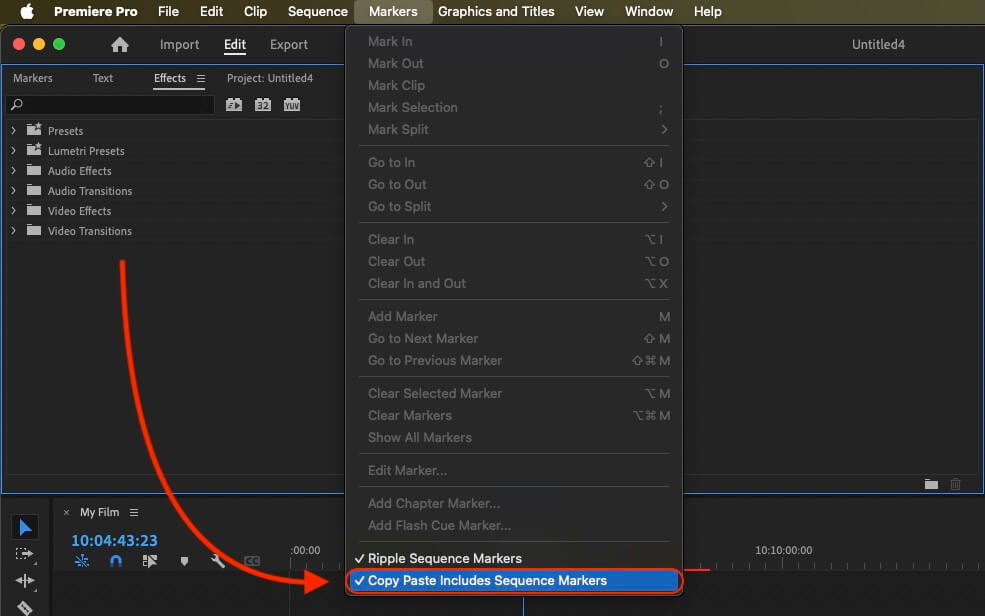
If you want to copy these markers into the existing sequence, use the adjustment layer or any other video as placeholder. Then copy the clip and switch to your existing sequence. Move the cursor to the location, where the adjusmtent layer or first marker appeared in the other sequence. Then past it. It will only copy the timeline markers if under setting (in the Markers menu) the option "Copy Paste Includes Sequence Markers" is active.
🚀 Gata
Deocamdată asta e tot! Dacă tutorialul vi s-a părut util, vă rugăm să-l distribuiți pentru a ne susține. Dacă aveți sugestii despre cum am putea îmbunătăți fluxul de lucru, vă rugăm să ne anunțați!