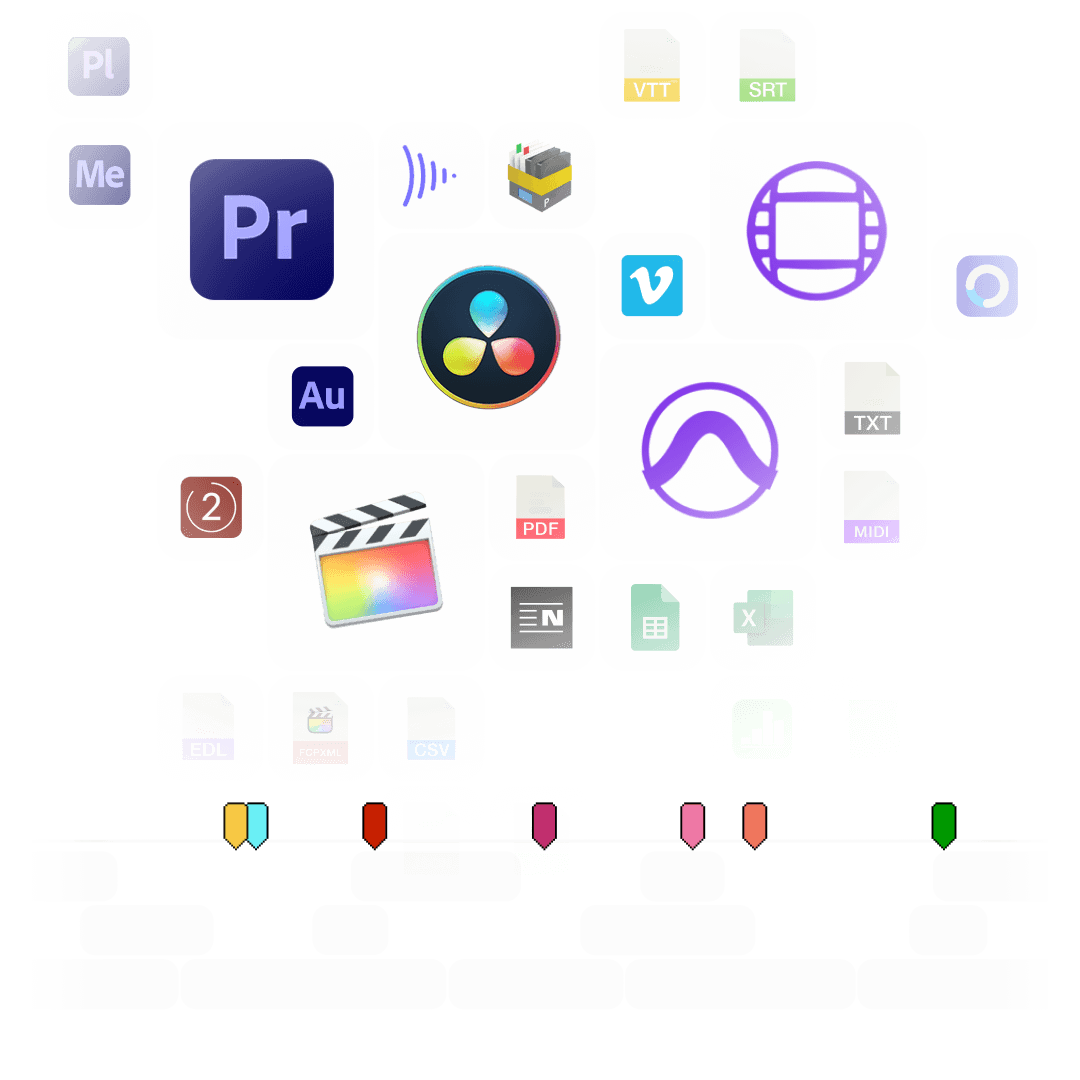
Simplificarea schimbului de markeri între diferite programe. Convertiți markerele de cronologie în diverse formate pentru Premiere Pro, DaVinci Resolve, Media Composer, Pro Tools, Frame.io, Pix, CSV, Google Sheets, PDF și multe altele. Instrumentul vă permite, de asemenea, să filtrați markerele după culoare, să schimbați culorile sau să mutați și să corectați codurile de timp.
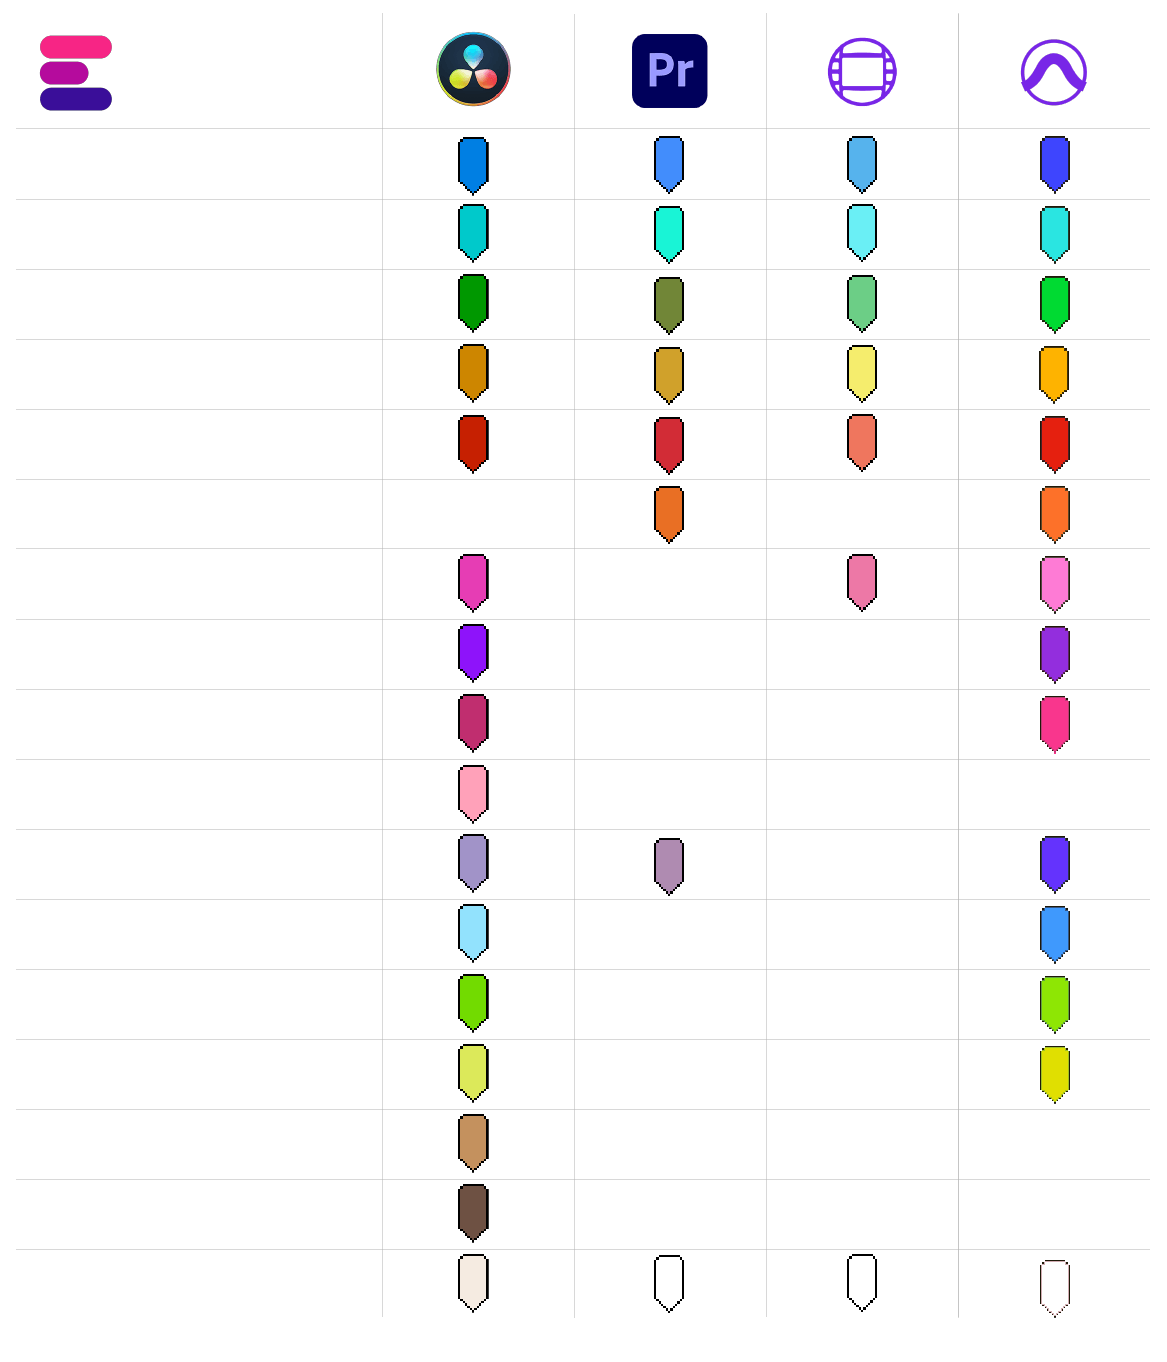
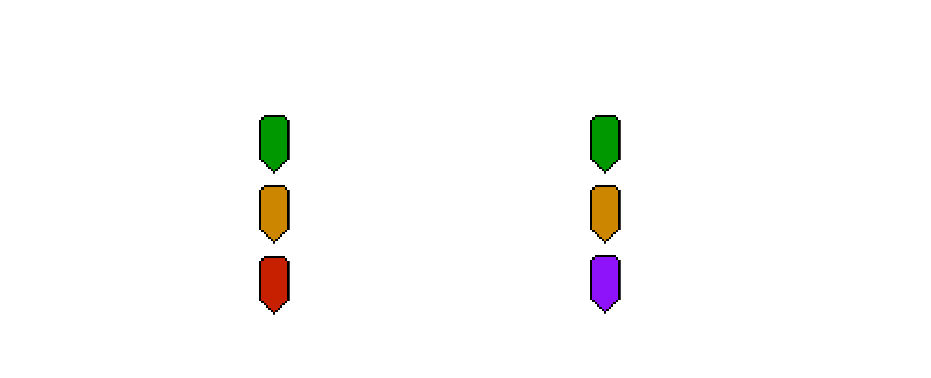
Nu există reguli uniforme pentru culorile markerilor în diferitele programe informatice. Fiecare program utilizează tonuri de culoare diferite și, în parte, și denumiri de culori diferite. Convertorul de markere de la EditingTools.io încearcă să atribuie culoarea markerului la cel mai apropiat grup de culori.
Cu acest grafic, aveți o imagine de ansamblu asupra culorilor recunoscute și a modului în care sunt interpretate.
Puteți defini o culoare implicită a marcajului care să fie utilizată în cazul în care nu este definită nicio culoare sau dacă nu este cunoscută în fișierul de import.
Cu ajutorul acestei funcții, puteți filtra marcajele și puteți specifica faptul că numai anumite marcaje sunt convertite. Dacă doriți să filtrați mai multe culori, vă rugăm să utilizați funcția "Change marker colors" (Schimbă culorile markerilor).
Utilizați această funcție pentru a muta toate markerii cu un anumit interval. Puteți introduce o valoare pozitivă sau negativă.
Activați această opțiune pentru a include markeri de clip din Premiere Pro XML și FCP7 XML. Această opțiune va adăuga, de asemenea, ID-ul pistei, numele clipului, sursa, codul de timp sursă de intrare și codul de timp sursă de ieșire în exporturile CSV.
Suprascrieți numele markerilor și atribuiți un titlu de marker separat pentru fiecare culoare. De exemplu, puteți numi automat toate markerele galbene "VFX" și toate markerele albastre "ADR" fără a pierde descrierea.
Utilizați această funcție pentru a realoca culorile markerilor. Trebuie doar să definiți noile culori ale markerilor prin intermediul câmpurilor de selecție. De asemenea, puteți utiliza această opțiune ca un filtru de culoare avansat.
Puteți încărca până la 20 de fișiere de marcaj diferite în același timp și le puteți combina într-un singur fișier de marcaj. Vă rugăm să rețineți că toate aceste fișiere trebuie să aibă același format.
Introduceți codul de timp de început al sesiunii sau al secvenței de editare, dacă utilizați altceva decât 00:00:00:00:00. Acest lucru este necesar, de exemplu, dacă convertiți la Avid Pro Tools și Adobe Premiere Pro sau din Frame.io sau Pix în orice alt format.
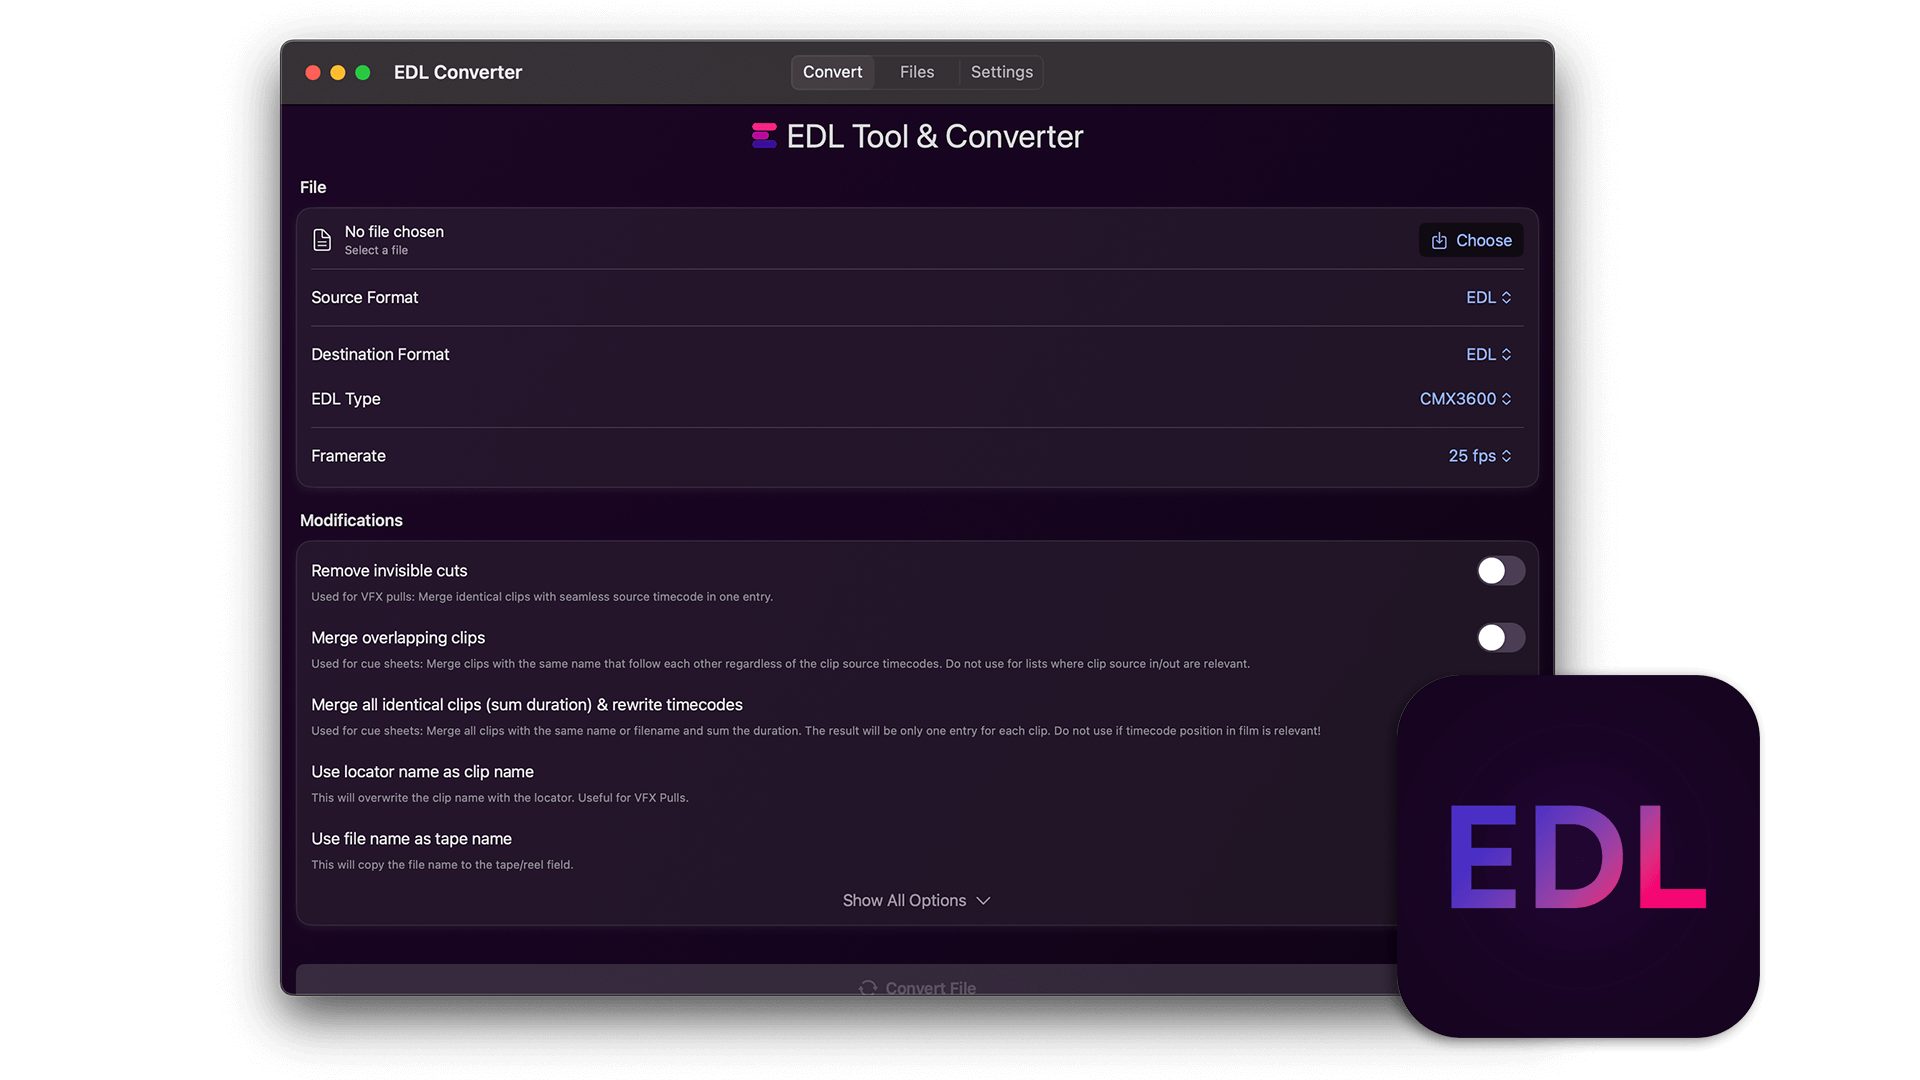
Puteți selecta un fișier EDL și puteți transforma fiecare clip într-un marker. Acest lucru este util pentru a marca toate cadrele VFX dintr-o dată, de exemplu. Puneți-le pe o pistă separată într-un program de editare și exportați un EDL doar cu această pistă video. Setați câmpul "Convert from" la "Convert clips from EDL into markers" (Convertiți clipurile din EDL în markeri).
The following applications and file formats are supported among others. See our instructions for each format below.
| Editing Software | Adobe Premiere Pro, Adobe Audition, Apple Final Cut Pro, Avid Media Composer, Avid Pro Tools, DaVinci Resolve |
| Review Tools | Frame.io, Vimeo Review, Dropbox Replay, Pix Systems, NoteTracks Pro, Krock.io |
| Subtitles | SRT, VTT, SBV, (more in our Subtitle Tool) |
| Docs & Sheets | PDF, CSV, Text, Excel, Google Sheets, Apple Numbers, OpenDocument Spreadsheet, TSV |
| Other Tools | oTranscribe, Adobe Prelude Live Logger, NanoLokit Logs |
Go to "File -> Import" and select the xml file.
Select the sequence in your project tab.
In menu, go to: "File -> Export -> Final Cut Pro XML"
Select "Final Cut Pro XML" and hit ok.
You can use Adobe Prelude Live Logger app to create live timecode notes and tags which you can export and convert in this tool into other marker formats.
Go to: "Tools -> Marker"
Right Click: Import Markers
Select the generated "xml" or "txt" file from EditingTools.io.
Go to: "Tools -> Marker"
Right Click: "Export Markers as XML" OR "Export Markers as Text"
Select "Change marker duration" from the "more options" menu.
Yes, you can overwrite the marker name within the marker description field in Media Composer. Simply use "|" to separate the name and the description. When you import the markers to EditingTools.io, it will be split into name and description.
Avid Media Composer might fail importing markers if they overlap.
There are 3 different ways to bring markers into Avid Pro Tools. The most suitable of these 3 is the Pro Tools PTX format.
| PTX Session Data | MIDI File | EDL File | |
|---|---|---|---|
| Marker colors | Yes | No | No real markers but clips with the marker name as clip name. |
| Individual Session Timecode Start | Yes | Yes | Not relevant |
| Adjustable audio pull rate | Yes | No | Not relevant |
| Adjustable sample rate | Yes | No | Not relevant |
| Import new markers at a later time | Yes | No. Pro Tools allows only one Midi track with markers per session. | Yes |
In ProTools, go to "File > Import > Session Data". Select and open the generated ".ptx" file. In the "Import Session Data" window, make sure the "Ruler Markers / Memory Locators" box in the lower "Session Data" panel is checked. Press "OK" and your markers will be imported.
The PTX converter was developed in partnership with Sounds in Sync. Therefore, we are currently unable to offer the converter for free.
We are currently unable to offer a flat rate for PTX conversions. If you need unlimited conversion, you can have a look at EdiMarker from Sounds in Sync.
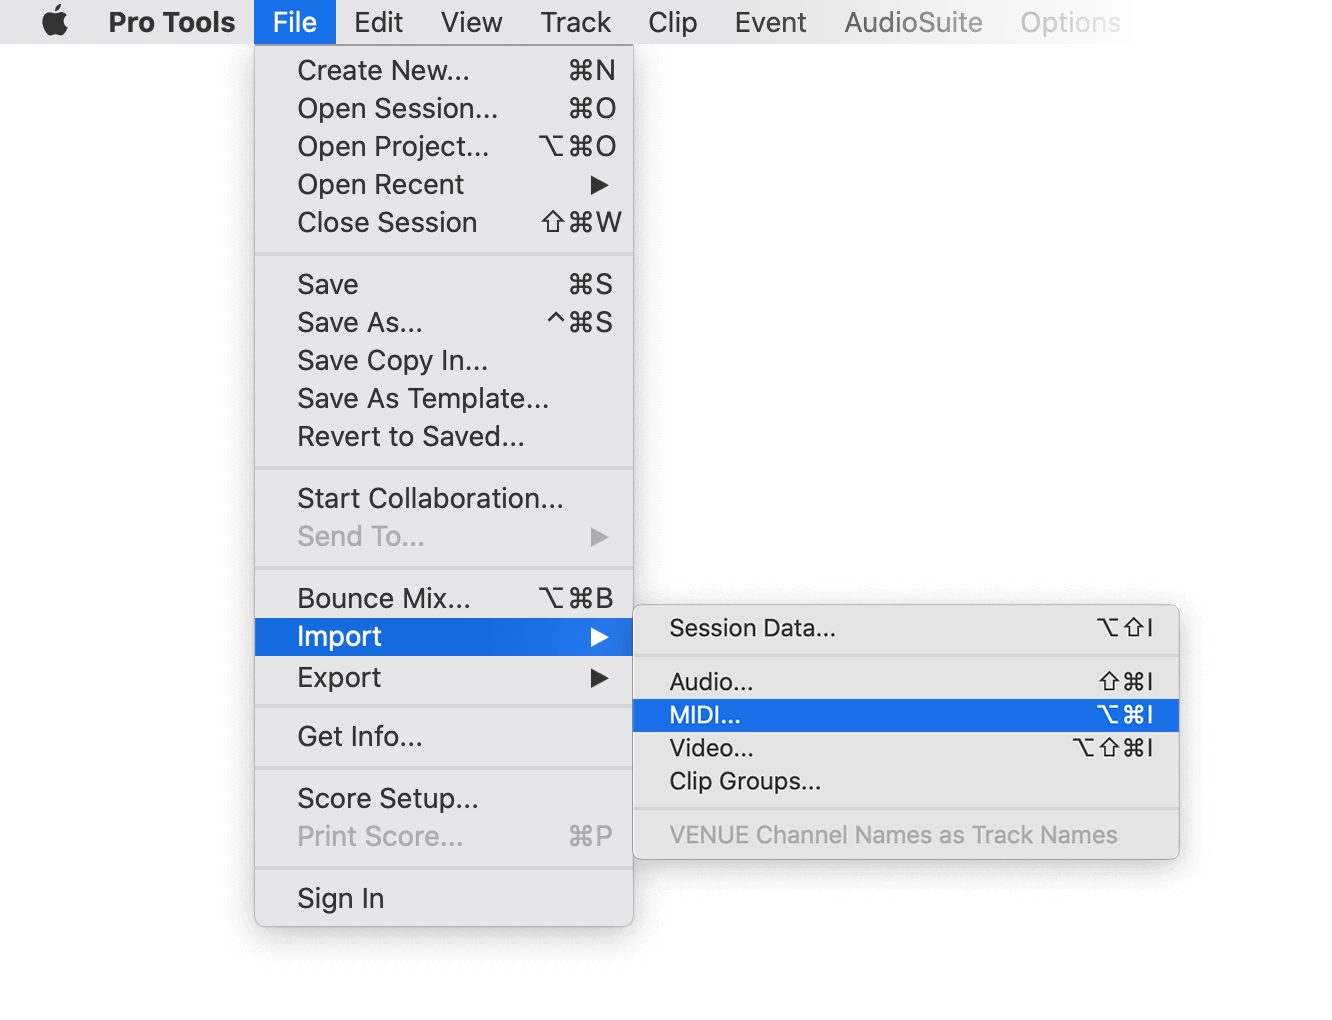
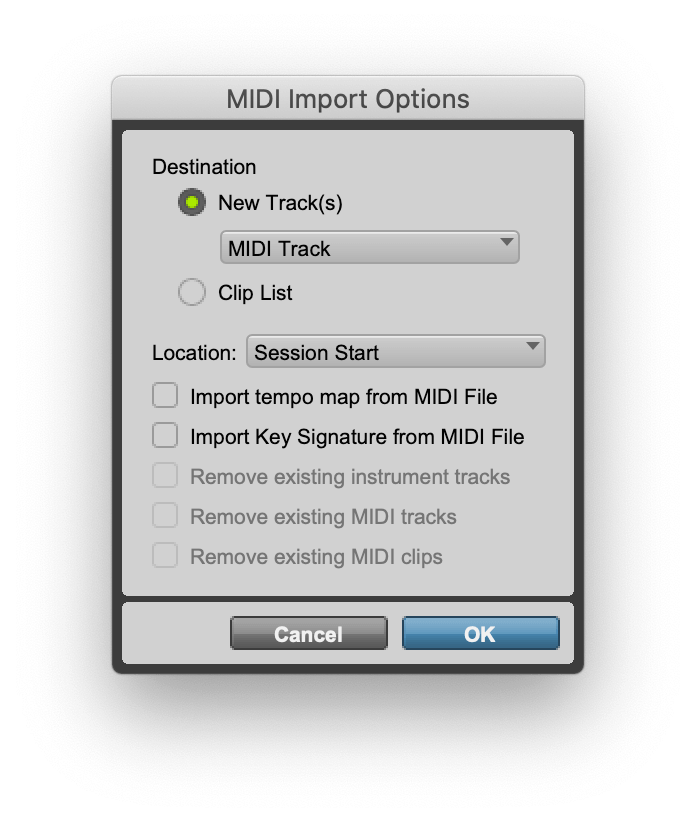
Under "File -> Import -> Midi" you can import the generated marker file into Pro Tools. Select the file and then "Add Midi Track". Attention, if there is already a midi track with markers you have to remove them first. If your session is not at 00:00:00:00 the imported markers have an offset.
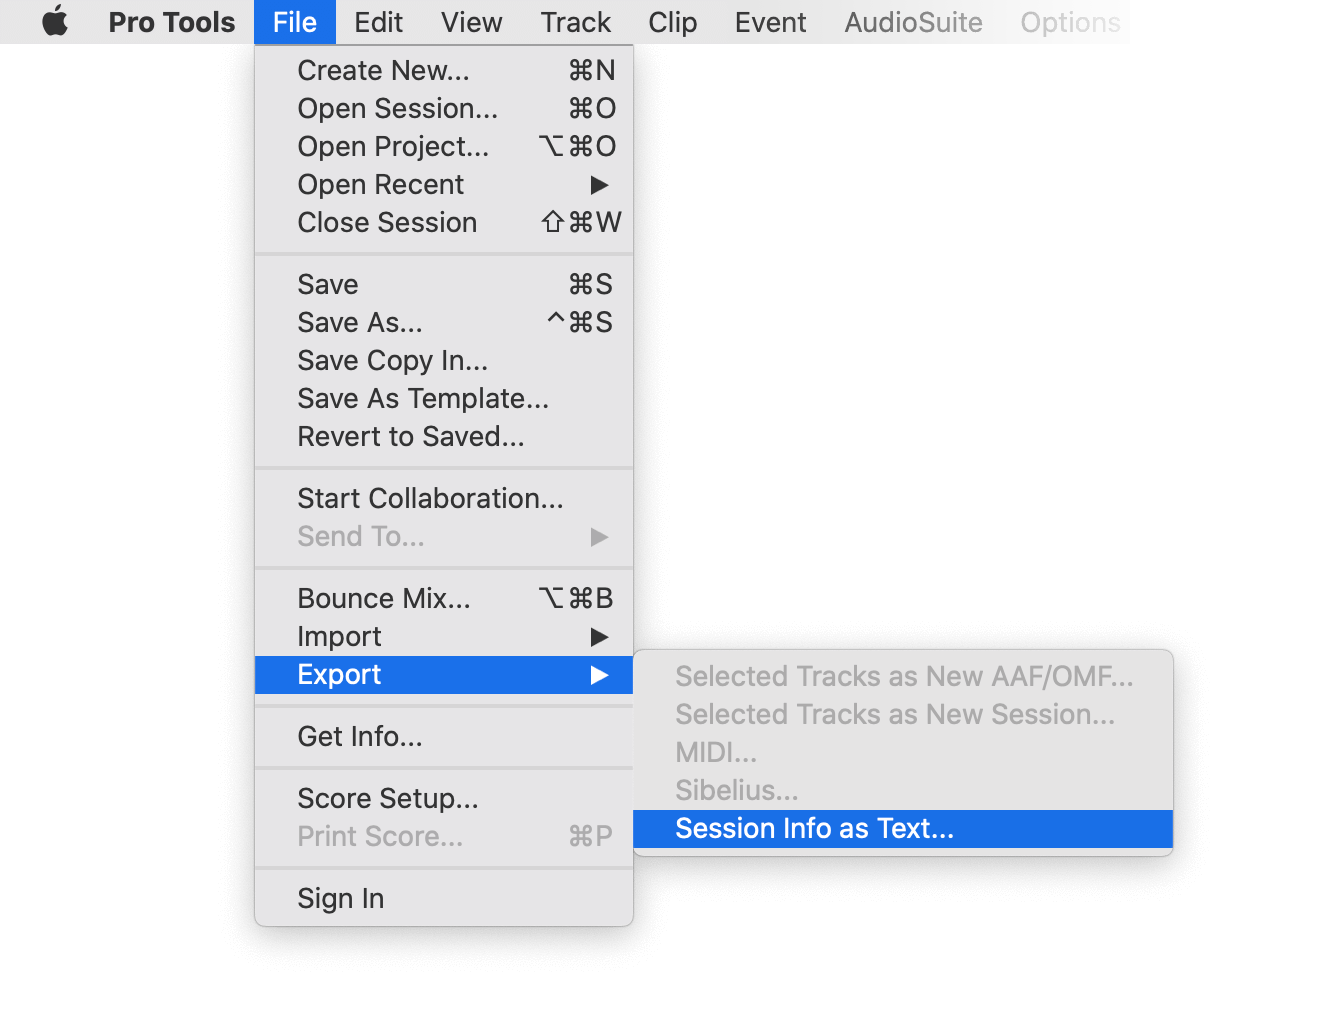
Under "File -> Export -> Session Info as text" you can export the markers from Pro Tools.
1. Create a new timeline or open a timeline in your project
2. Right-click the sequence timeline in your media tab.
3. Navigate to: Timelines > Import > Timeline Markers from EDL
4. Select the edl marker file for Resolve.
1. Select the sequence in your media tab.
2. Right-click the sequence timeline.
3. Navigate to: "Timeline > Export > Timeline Markers to EDL (.edl)"
Navigate to: "Timeline > Export > Edit Index (.csv)"
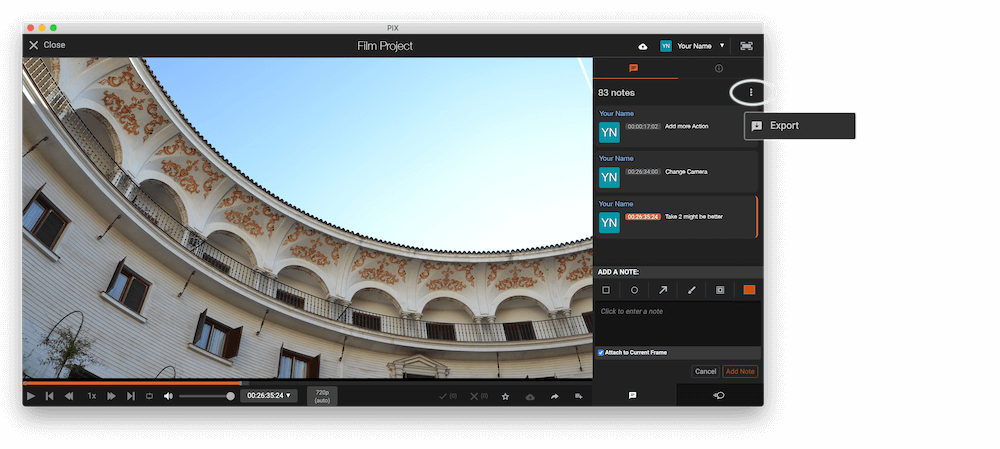
Open the comments panel on the right side in Pix. Press the three dots and select "Export". You can then download a CSV file from Pix that you can import into EditingTools.io.
Export markers from frame.io in marker menu "Download as File" > "CSV".
Export review notes from your project on vimeo.com as "CSV". Select "Vimeo Review" in the tool as "from" value.
You can use this tool to convert markers to YouTube Chapter Markers for the video description. Select "Convert to" to "YouTube Chapter Markers (.txt)". Open the generated .txt file and paste its contents into your video description.
To export markers and comments from NOTETRACKS Pro, click the Download button in your active session and select "NoteTracks.com > Audition Markers (.csv)". In our Marker Tool, select Convert from "NoteTracks.com > Audition Markers (.csv)".
NOTETRACKS Pro is an online review platform for audio creators. Learn more at notetracks.com.
To export comments from Krock.io, select a video and open the menu via the three dot icon. Select "Export comments to csv" to export the comments. In the marker converter select "Krock.io" as "convert from" value.
Krock.io is an online media content review tool. Learn more at Krock.io.
Convert comments from E-Mail, Word, Pages, Slack, Chats or any other clean Text Source into markers using the Textfield option. Simply copy and paste the comments into the textfield.
0:32 Please add Music
1min Intro
1:55min Add Cut
17.6min VFX Shot?
21:12 Add Detail Shot
23.1 VFX
75:20 Credits?
1:32, 01:32, 00:01:32, 1.32, 01.32, 1:32min → TC 00:01:32:0075:20, 75:20min, 75.2 → TC 01:15:20:00
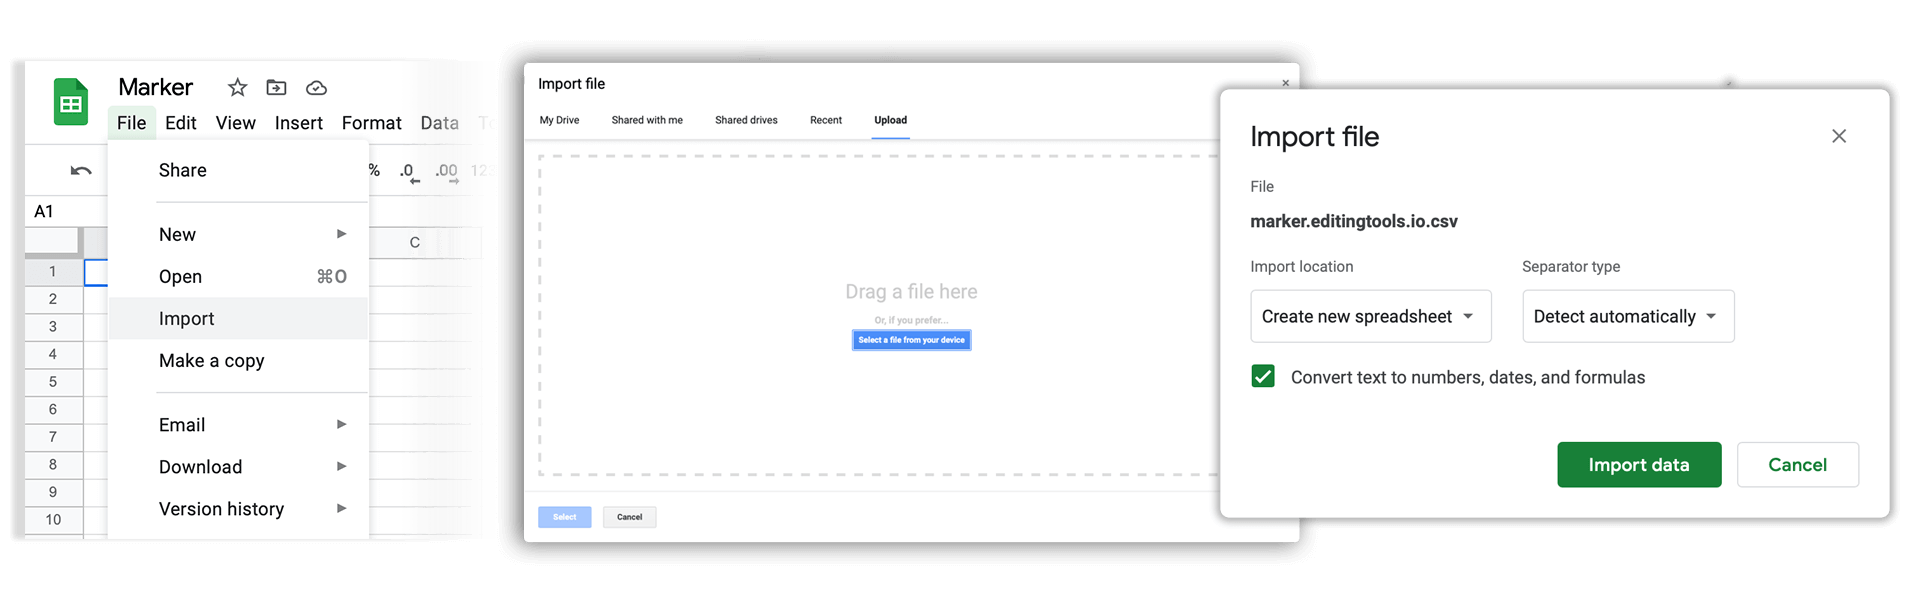
Open Google Sheets and go to "File -> Import". Upload the generated CSV file and press "Import Data".
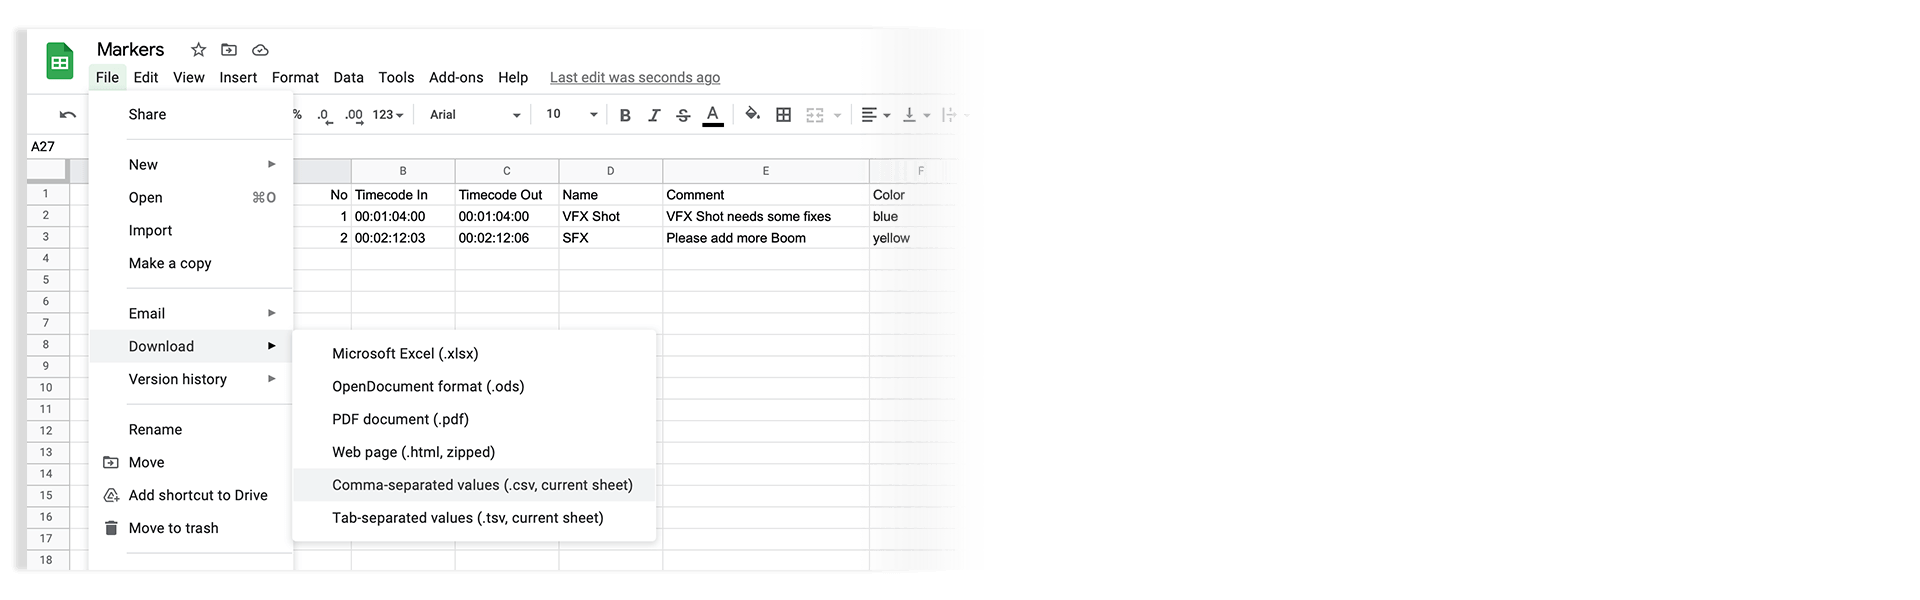
Go to "File -> Download -> Comma-separated values". Download the CSV demo file here: demo_marker_file.csv.
Markers can be exported as XLSX or XLS files for Microsoft Excel.
Markers can be exported as ODS (OpenDocument Spreadsheet) file for Open Office Calc.
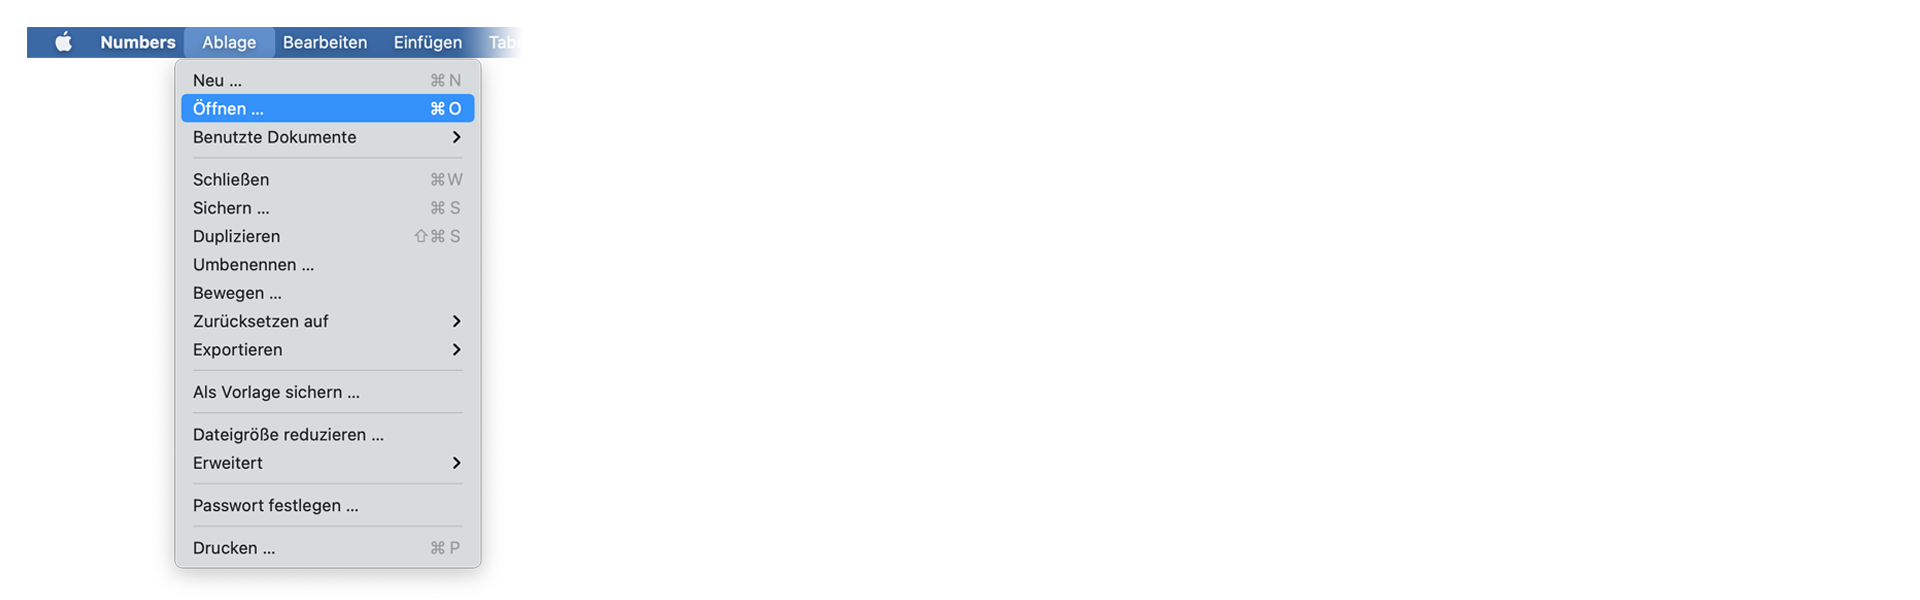
Open Numbers and go to "File -> Open". Simply open the CSV file.
Go to "File -> Export -> CSV". Download the CSV demo file here: demo_marker_file.csv.

Yes. Just take a look at our demo files to match the rules for correct interpretation. The marker converter accepts comma-, semicolon- and tab-separated files.
Download the CSV demo file here: demo_marker_file.csv.
Marker CSV Preset in Google Sheets: Open in Google Drive.
Only "Timecode In" is necessary. All other headers are optional. Accepted colors: blue, cyan, green, yellow, red, orange, magenta, purple, fuchsia, rose, sky, mint, lemon, sand, cocoa, white, black
Simply select your subtitle file.
Yes. Have a look at our Subtitle Tool & Converter.
To export a PDF, select pdf as output format.
You can use otranscribe.com to generate your markers from any audio or video file.
To export the markers go to "Download Transcript as" and download your script as "oTranscribe format (.otr)".
Ambient's NanoLockit is a great way to log takes on set. The log files (.markers) can be converted to any other format using this marker converter.
Learn more about the NanoLockit on ambient.de/collections/nanolockit
You can export comments from Dropbox Replay in JSON format to convert them with our tool.
Our free marker tool offers a huge amount of features to convert and modify files. However, there are some limitations on the free tier that require a PRO subscription to unlock.
Explore Pro Features| Feature | Free | Pro |
|---|---|---|
| Conversion limit | Fair Use | No limit |
| Entries per file | up to 1200 | No limit |
| Premium formats | ✕ | ✓ |
| File encryption | ✕ | ✓ |
We have a light version of our Marker Converter available as an offline app for macOS and iOS. It is aimed at users on air-gapped systems and enterprise customers.
The supported formats and features in the standalone app are outlined in the app description. Not all features from the online app are available in the offline app.
Fie că sunteți dezvoltator sau doriți doar să automatizați mai multe procese cu instrumente precum Zapier sau Make, puteți integra cu ușurință acest instrument în fluxurile dvs. de lucru cu API-ul nostru. Aflați mai multe despre integrarea API REST în documentația noastră API.
Documentație API